DIY MONSTERA LEAF TRINKET DISH
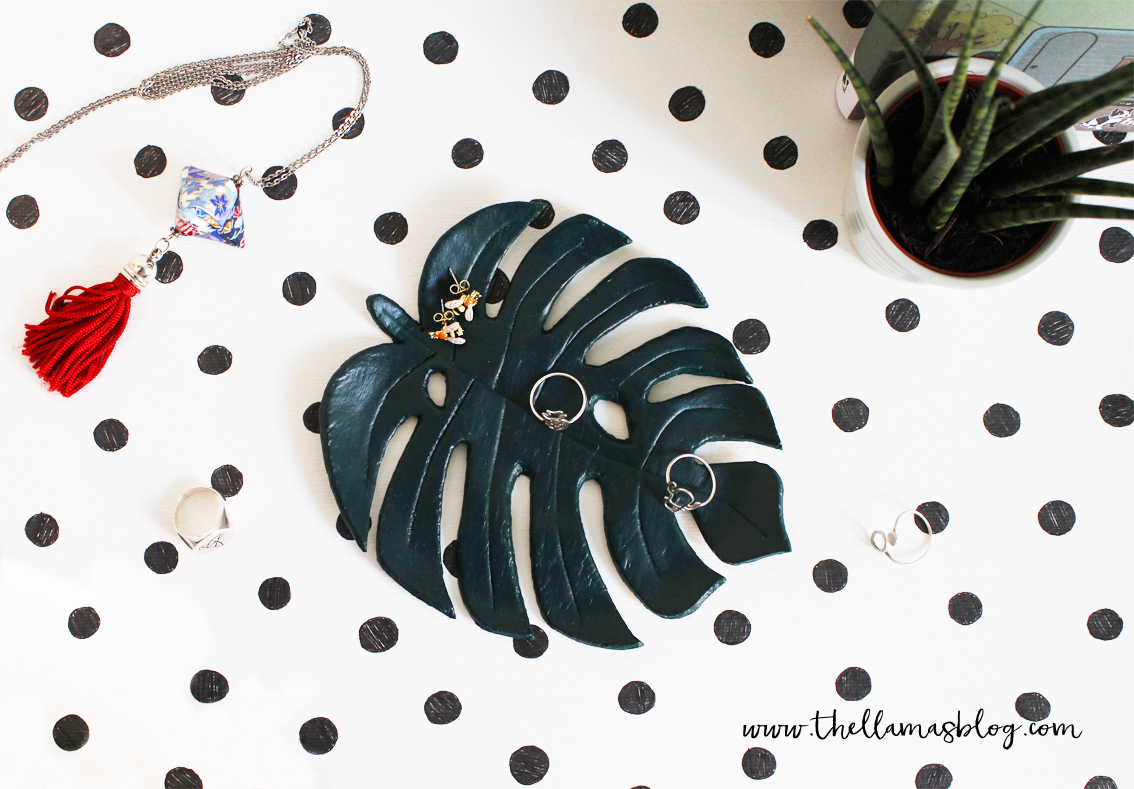
Welcome back! The blog is finally back up and running after the summer holidays! Do you remember the DIY Roundup dedicated to Monstera Deliciosa , one of the most pinned (and Instagrammed) houseplants of the moment? We said goodbye with the promise of a themed DIY and we kept it... in this post we explain step by step how to make a Monstera leaf-shaped saucer! You can also download the leaf template, to print on an A4 sheet. Having used air-hardening modeling clay, it is really simple to make, does not require cooking and is perfect if you love plants but do not have green fingers (like us :mrgreen: ). We like the look of the leaf when it is very open, if you prefer it more closed you can modify the shape to your liking and in this way you will also obtain a larger saucer. Let's get started!
Welcome back! The blog finally comes back into operation after the summer holidays! Do you remember the DIY Roundup dedicated to Monstera Deliciosa , one of the most pinned (and instagrammed) apartment plants of these time? We greeted you with the promise of a Monstera themed DIY and we kept it...in this post we are going to explain step by step how to make a Monstera leaf trinket dish! You can also download the leaf silhouette, which can be printed on an A4 sheet. Having used the air clay this dish is really easy to make, does not require cooking and is perfect if you love plants but you don't have the green thumb (just like us :mrgreen: ). We like the appearance of the leaf when it's very open, if you prefer it more closed you may modify the template as you like and in this way you will also get a larger dish. Let's begin!
For the tutorial in English click on “ENGLISH” label.
[wc_tabgroup layout="box"]
[wc_tab title="ENGLISH"]
MATERIALS
- self-hardening modelling clay (DAS)
- acrylic colors
- Leaf shape (see below)
- brushes
- spatula
- file
- a small plate
- kitchen film
- rolling pin
- waterfall
DOWNLOAD SILHOUETTE
- Download the leaf template in PDF here.
PROCEDURE
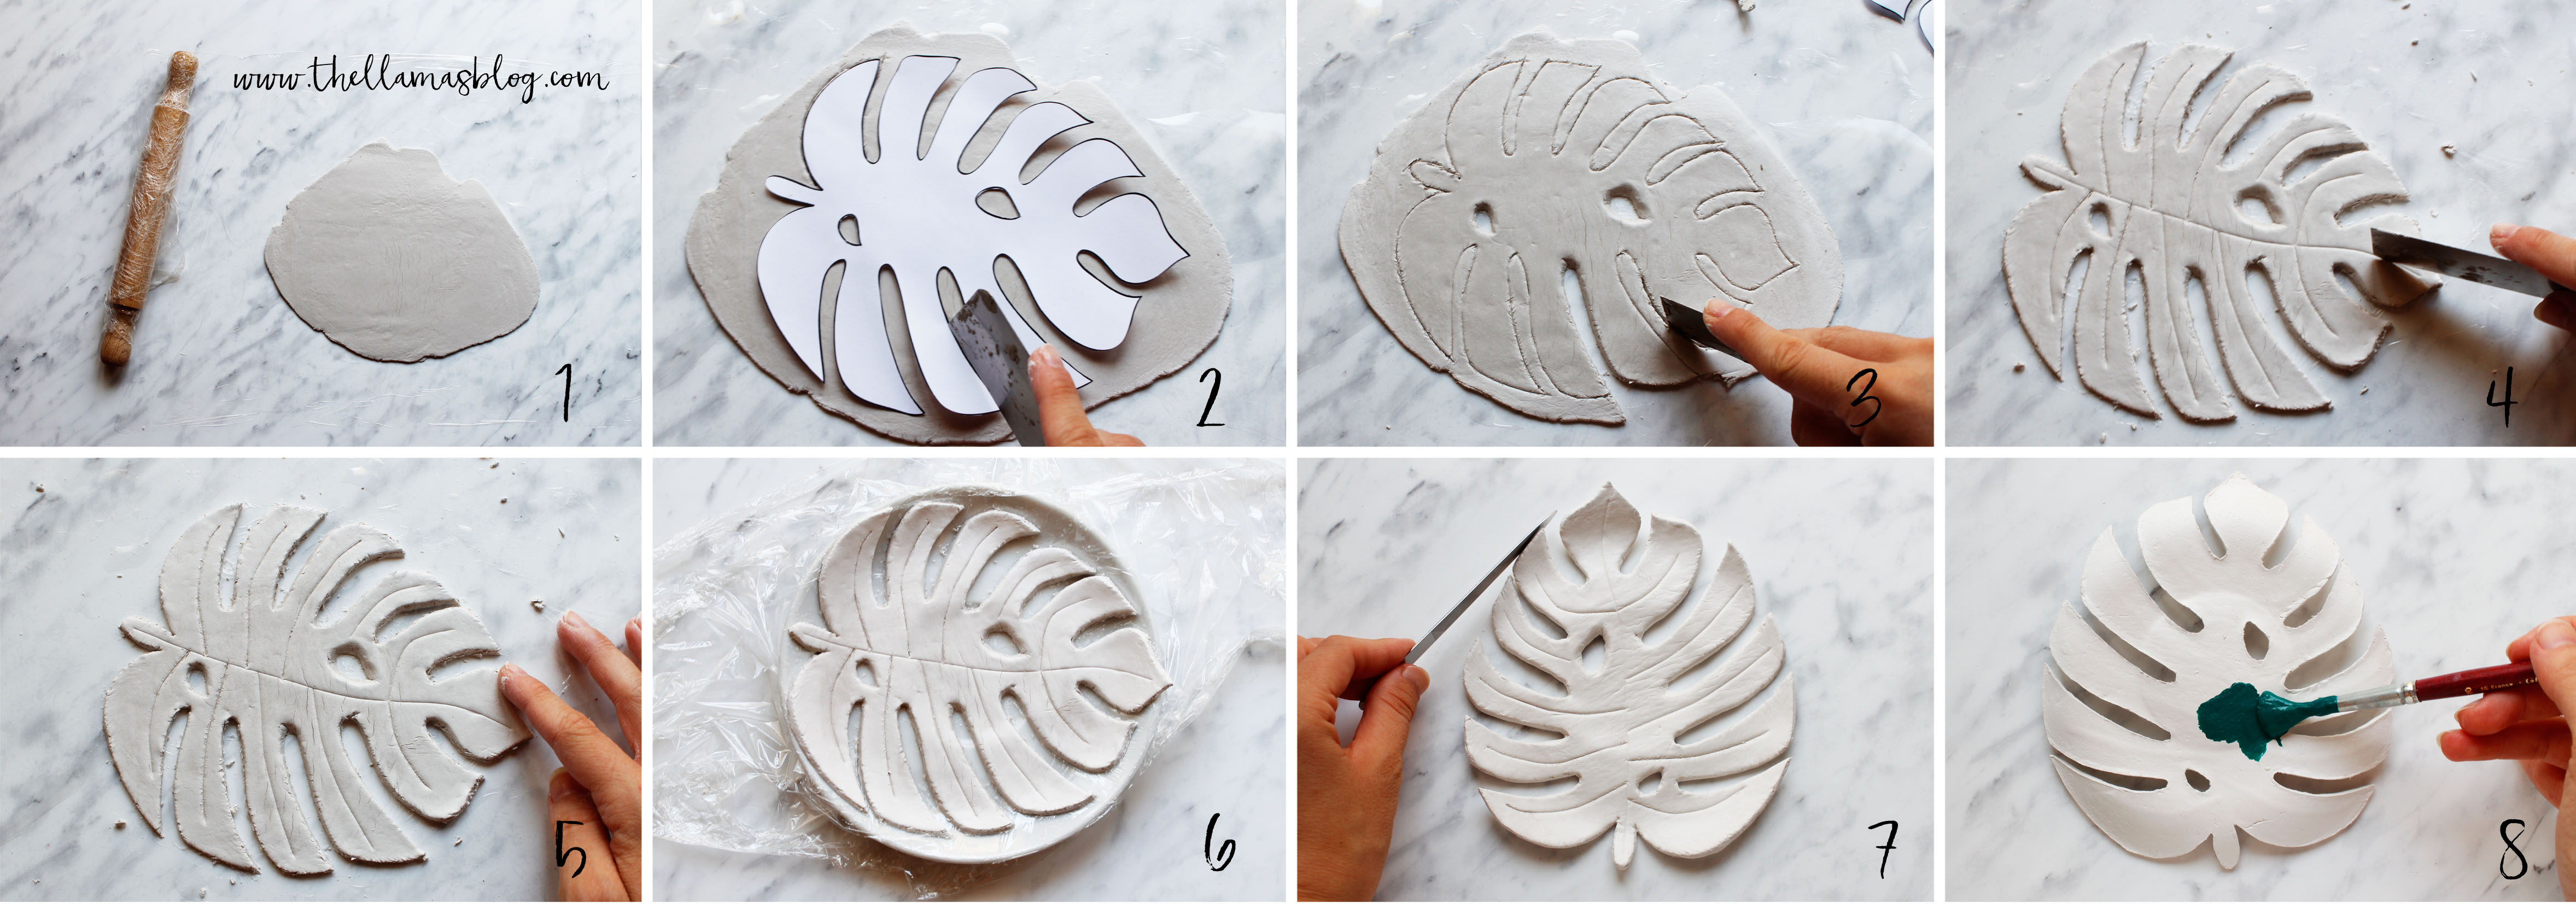
1. Cover the work surface with cling film and roll out the modelling dough using a rolling pin (preferably wrapped in cling film) until you obtain a disc 2-3 millimetres high [wc_highlight color="red"] (1) [/wc_highlight].
2. Cut out the shape of the leaf, place it on the modelling clay disc and trace the outlines using the spatula [wc_highlight color="red"] (2) [/wc_highlight].
3. Always using the spatula, remove the excess dough. For the smaller parts, a tool with a smaller tip can be useful (a wooden toothpick will also work) [wc_highlight color="red"] (3) [/wc_highlight].
4. Score the veins of the leaf, pressing lightly with the tip of the spatula [wc_highlight color="red"] (4) [/wc_highlight].
5. Using moistened fingers, shape the edges and surface of the leaf, to make them smoother [wc_highlight color="red"] (5) [/wc_highlight].
6. Lift the leaf from the work surface by peeling off the transparent film and place it on a small plate, pressing it lightly until it takes on the concave shape of the container [wc_highlight color="red"] (6) [/wc_highlight]. Leave the modelling clay to dry for the time indicated on the package.
7. Once dry, detach the leaf from the film. Refine the edges using a file [wc_highlight color="red"] (7) [/wc_highlight].
8. Paint the leaf in the color you prefer, then let it dry for a few hours [wc_highlight color="red"] (8) [/wc_highlight]. If necessary, give it another coat of color.
[/wc_tab]
[wc_tab title=" ENGLISH "]
MATERIALS
- air dry clay
- acrylic colors
- leaf silhouette (see below)
- brush
- spatula
- file
- to saucer
- kitchen movie
- rolling pin
- water
DOWNLOAD SILHOUETTE
- Download here the pdf leaf silhouette.
TUTORIAL
1. Cover the worktop with the kitchen film and stretch the clay by using a rolling pin (preferably wrapped in the film) until you get a disk 2-3 mm thick [wc_highlight color="red"] (1) [/wc_highlight].
2. Crop the leaf shape, place it on the clay disk and trace the contours using the spatula [wc_highlight color="red"] (2) [/wc_highlight].
3. Use the spatula to remove the excess clay. For smaller parts it may be useful to use a small toe tool (a wooden stick will be ok) [wc_highlight color="red"] (3) [/wc_highlight].
4. Trace the leaf veinings by slightly pressing the tip of the spatula [wc_highlight color="red"] (4) [/wc_highlight].
5. Moisten your fingers and mold the edges and the surface of the leaf, to make it smoother [wc_highlight color="red"] (5) [/wc_highlight].
6. Raise the leaf from the worktop by removing the transparent film and lay it on a saucer, pressing it lightly until it takes the concave shape of the container [wc_highlight color="red"] (6) [/wc_highlight]. Leave the clay dry for the time indicated on the package.
7. Once dry, remove the leaf from the film. Finish the edges using a file [wc_highlight color="red"] (7) [/wc_highlight].
8. Paint the leaf with your favorite color, then let it dry for a few hours [wc_highlight color="red"] (8) [/wc_highlight]. If necessary, give another coat of color.
[/wc_tab]
[/wc_tabgroup]
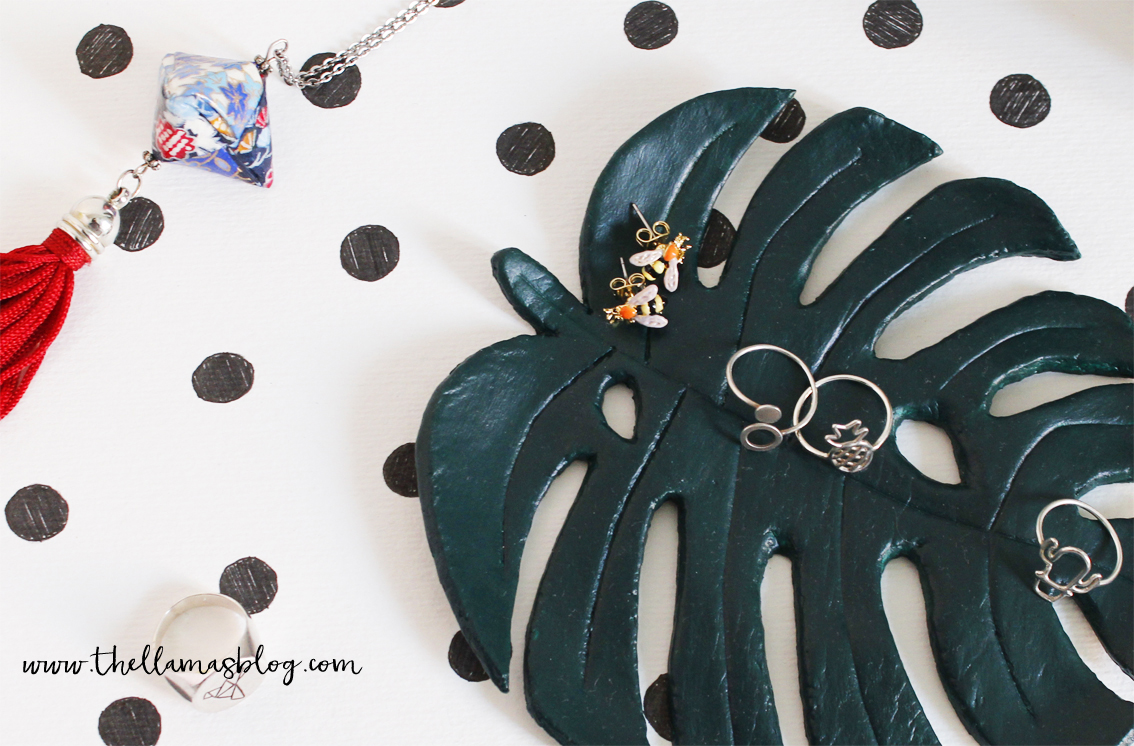
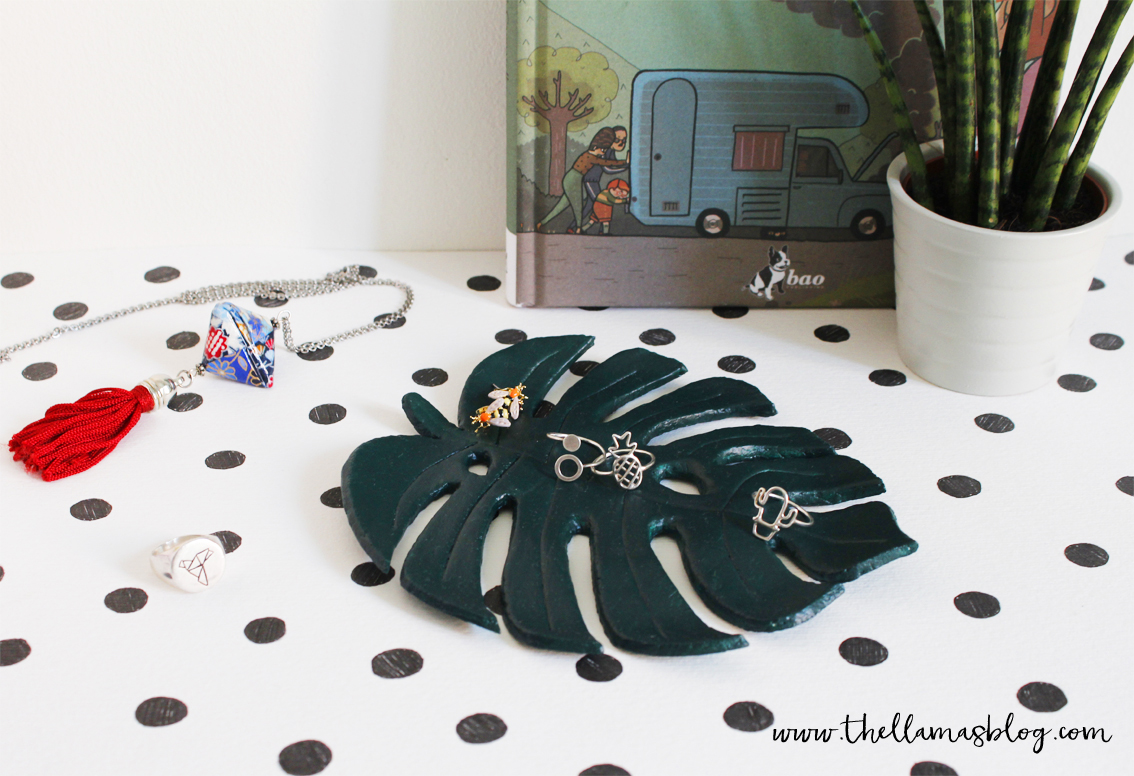
I would really like to have a Monstera specimen at home, but it is a plant that reaches considerable dimensions and our apartment is really small...luckily there is Laura who always manages to bring me back to reason! We hope you enjoyed this DIY, it was a bit of an experiment and we were not sure it would work (the anxiety that it would not stand was always lurking), but we must admit that we are quite satisfied with the result. We kept it classic and painted it green, but it would also be fantastic in a nice bright and vivid color. In short, personalize it and show us the result using the hashtag #thellamascrew!
I really would like to have one Monstera at home, but it's a plant that reaches a considerable size and our apartment is really small...fortunately there is Laura, she is always able to bring me to my senses! We hope that you appreciated this DIY, it was a bit of an experiment and we were not sure it would have worked, but we have to admit that we are quite satisfied with the result. We kept on the classic and painted it green, but it would be great even with a beautiful bright and brilliant color. Personalize your leaf and show us the result with the hashtag #thellamascrew!