DIY POTATO STAMPED WATERMELON PICNIC BLANKET

Hello everyone! Summer has finally arrived and, if you didn't miss our last post and follow us on social media , you will have seen how we celebrated: with the Summer Gift Party organized by Antonella from Blog a Cavolo and Lisa from Piccolecose Handmade , with a bike picnic theme, together with a nice group of creatives! The picnic blanket that Laura and I made for Lisa was very popular...so we decided to publish the step-by-step tutorial to make it, so you too can use it during your bike rides! It's a really simple DIY, but very effective...let's get started!
MATERIALS
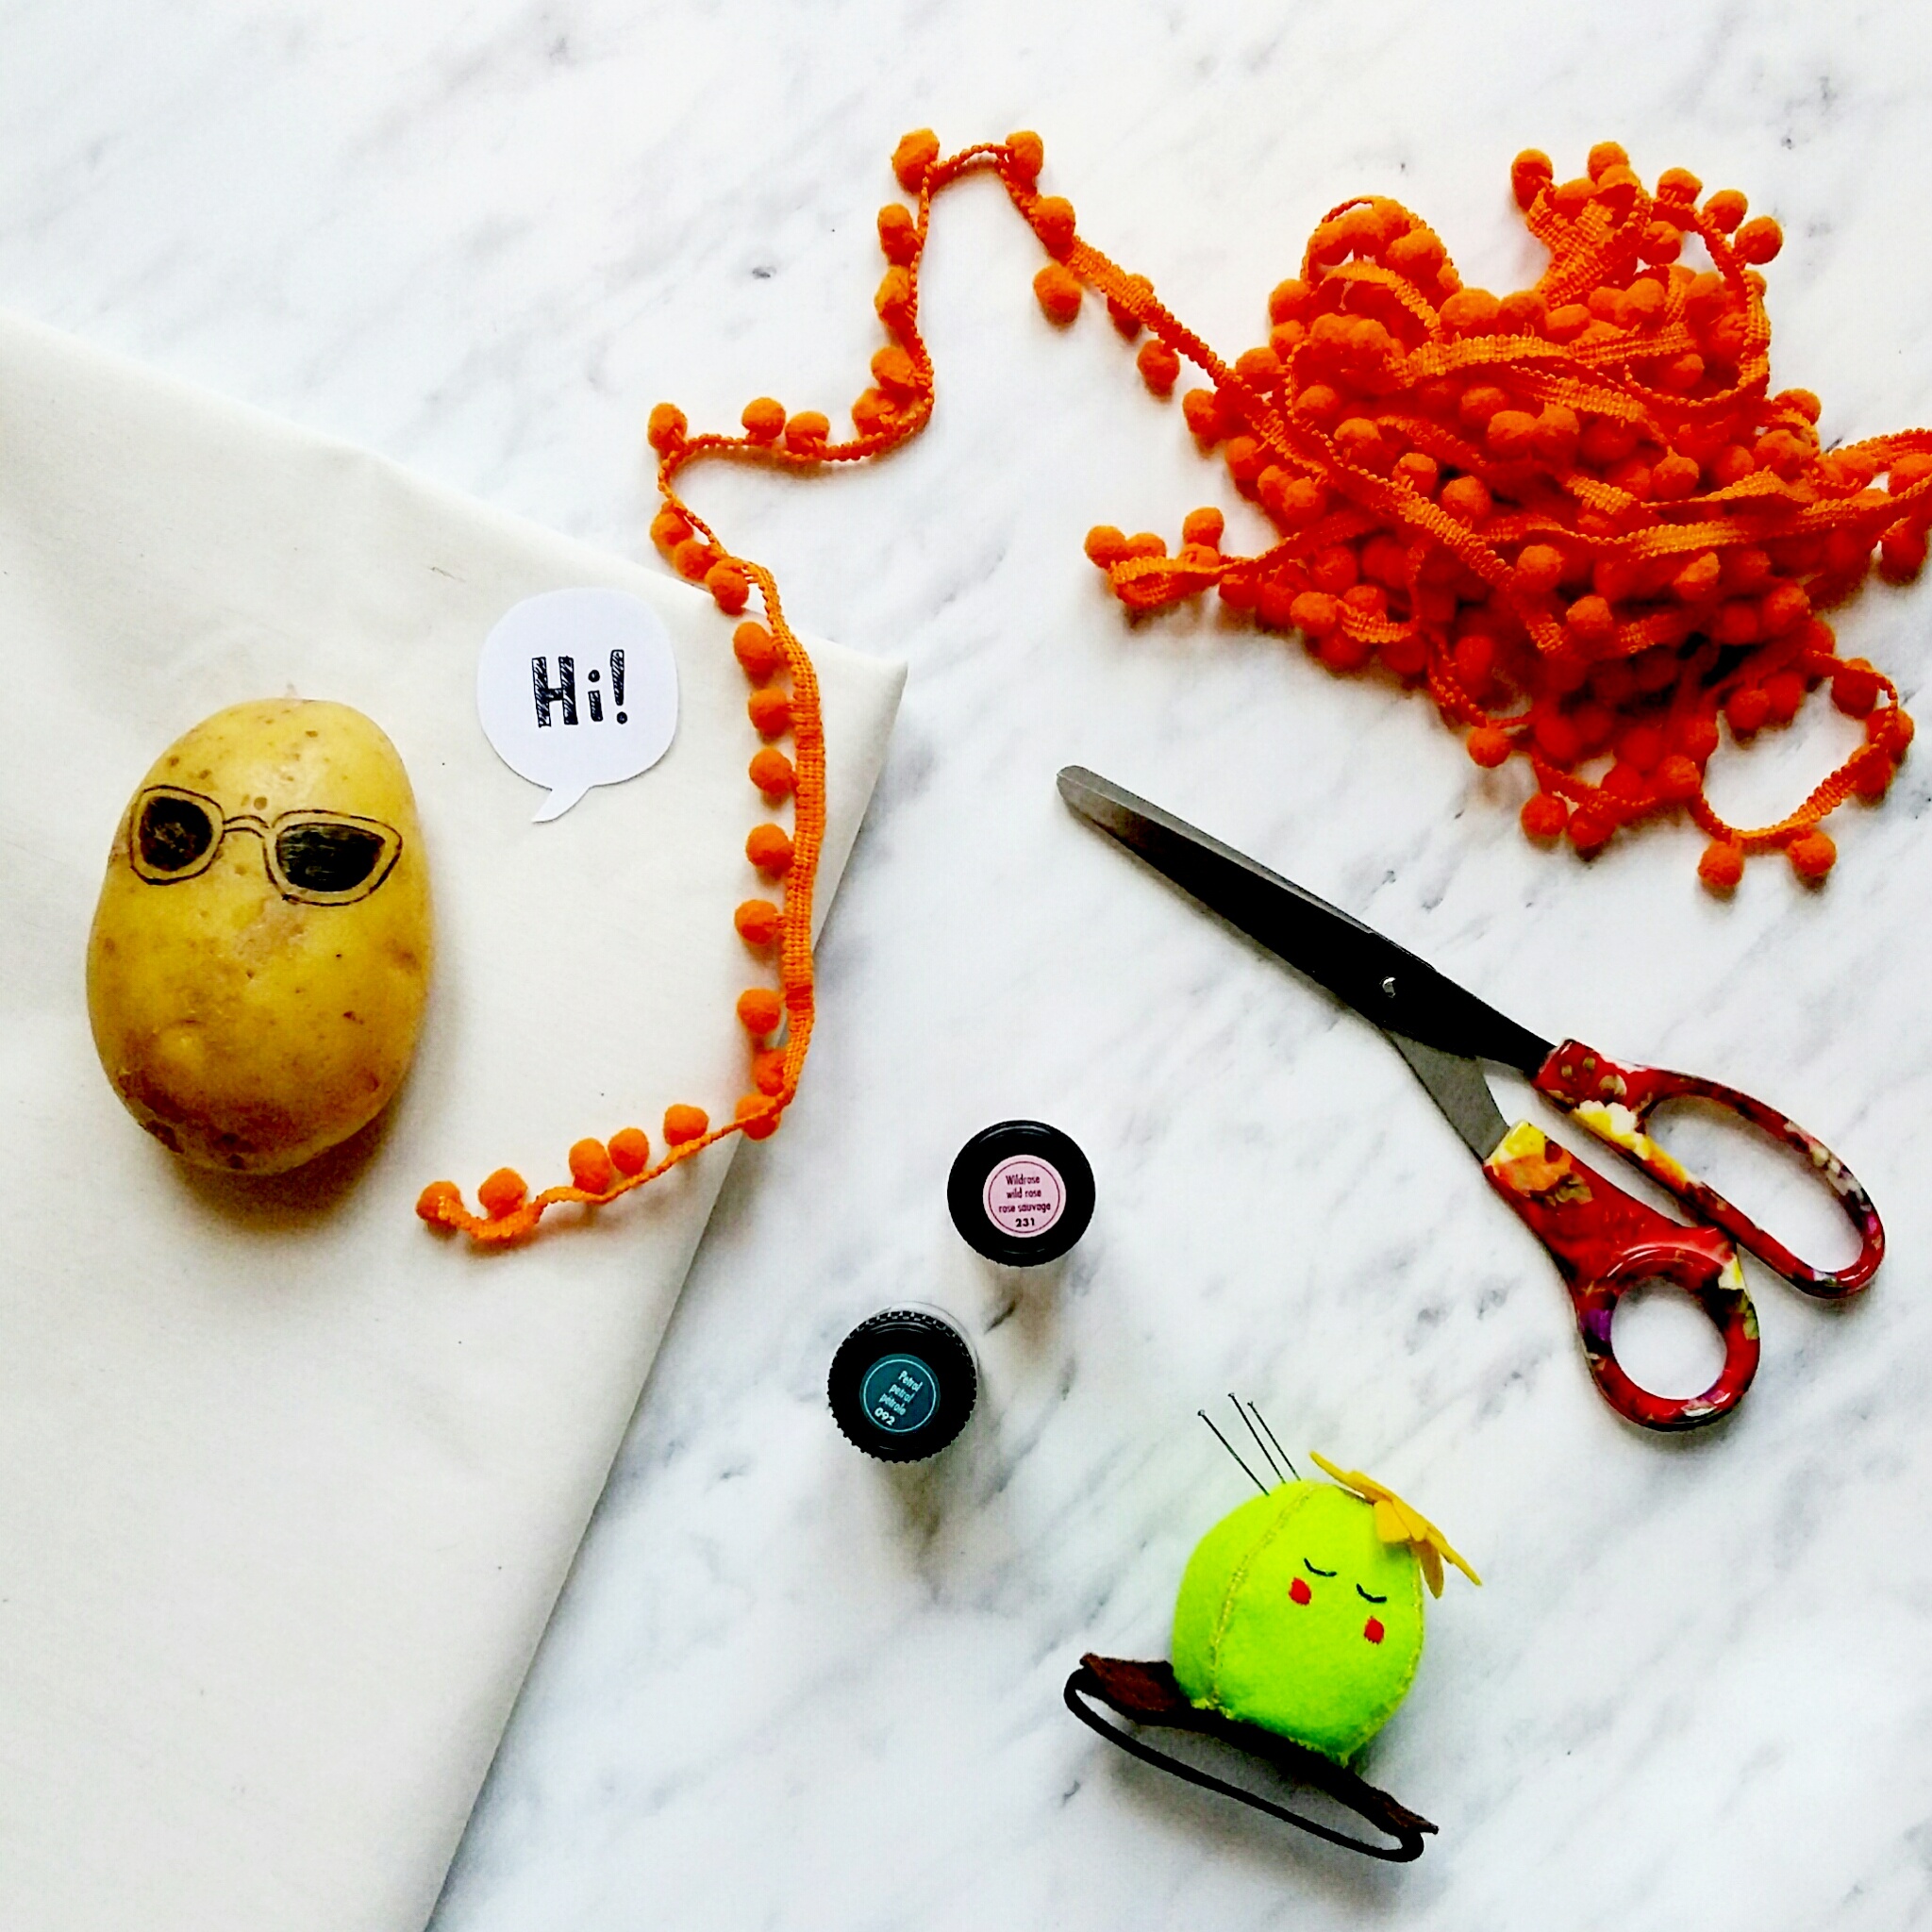
- cotton canvas
- orange little balls trimming
- pink and blue colors for fabric
- to potato
- scissors
- white thread (or blue, or orange)
- sewing machine
TUTORIAL

MAKE THE HEM
Wet the fabric and let it dry. Fold the edges of the fabric inwards, twice, of about 1 cm. Iron the edges with a hot iron (1) . Repeat on all sides, then sew the hems using the sewing machine (2) .
PRINT THE FABRIC
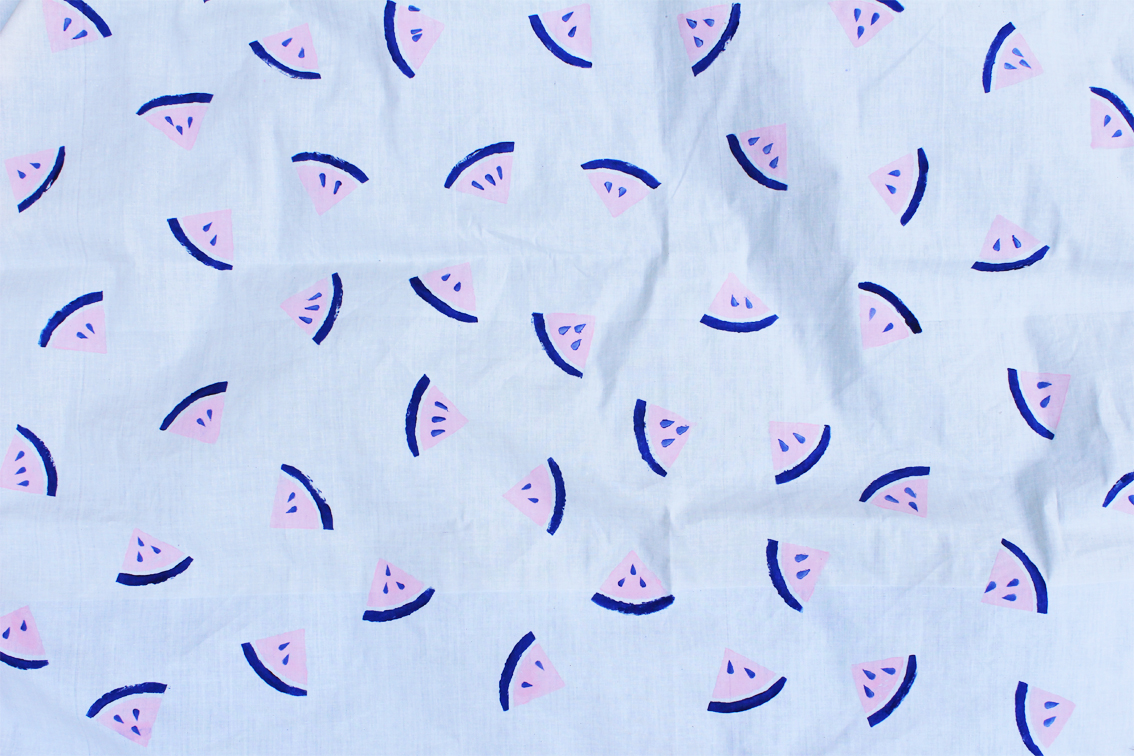
Create the stamp carving a large potato: use one half for the pulp and peel and the other half for the seeds (3) . Apply color to the stamp, helping yourself with a brush (4) , then print the watermelons in a casual order. Print the pulp with the peel first, let it dry and then print the seeds (5) .
COMPLETE THE BLANKET
After letting the color dry, fix it on the fabric: cover with a cloth and iron with a hot iron for a few minutes (follow the instructions on the color for fabric box). Then sew the trimming, using the sewing machine.
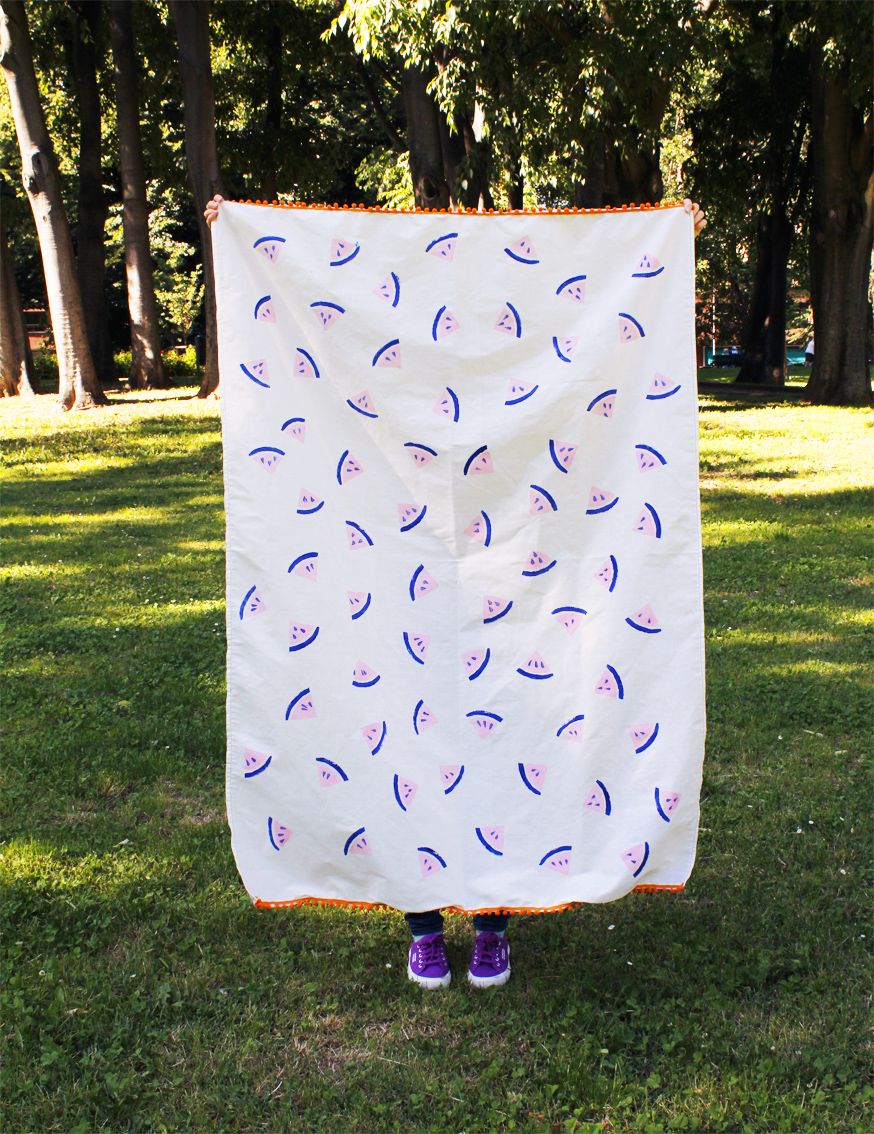
Simple, right? Make your own and take it with you on your summer picnics, or use it as a tablecloth during your outdoor dinners! And if you take some pictures, don't forget to share them using the hashtag #makethingsnotdramas , we're curious to see them!