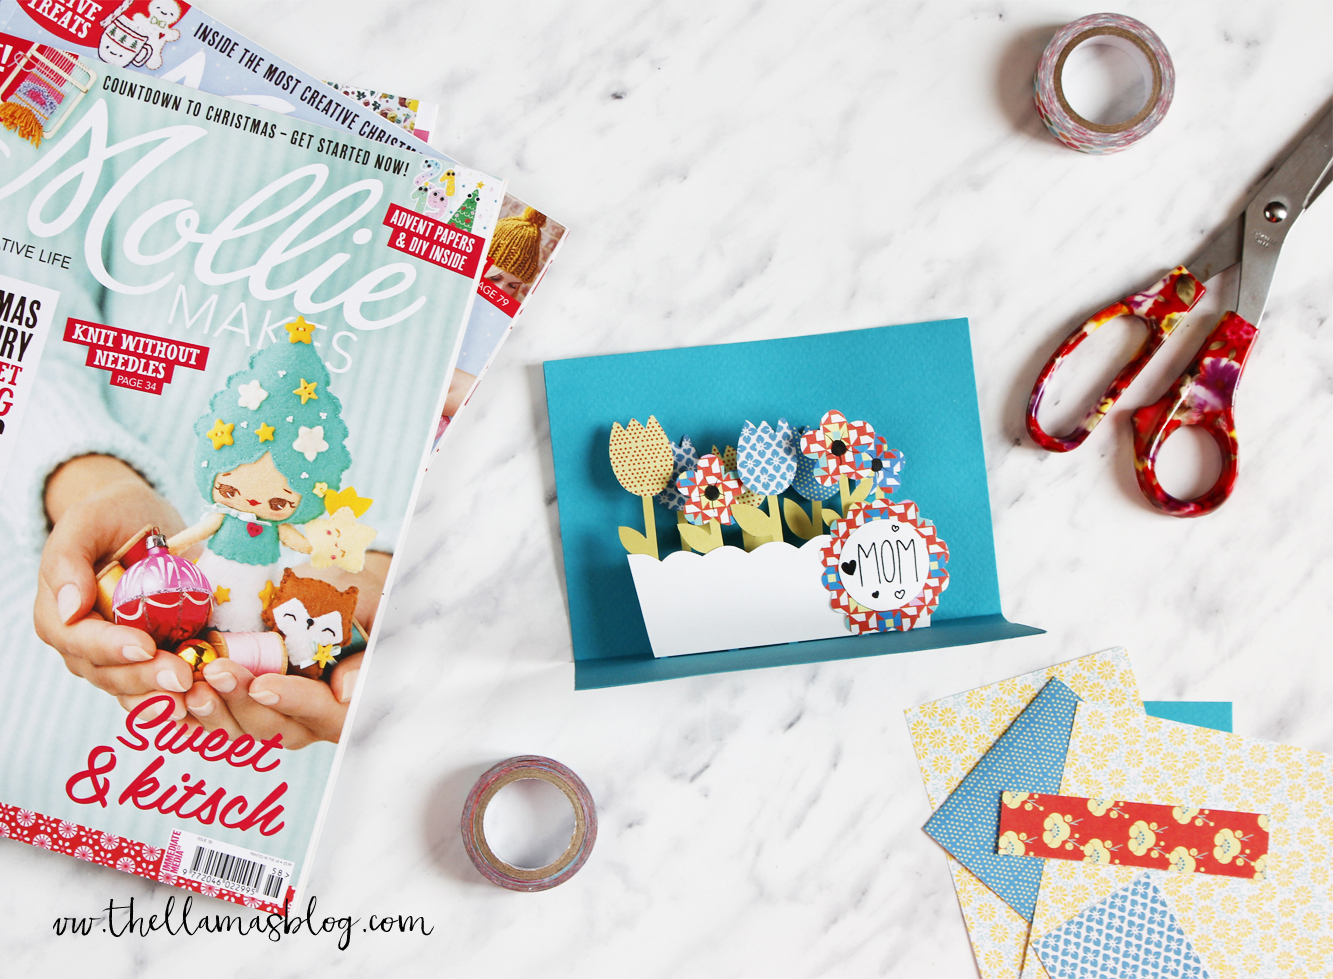
DIY MOTHER'S DAY POP-UP CARD
Tranquilli, non ci siamo dimenticate che questa domenica è la festa della mamma! Abbiamo pronto un bel DIY, veloce veloce e realizzato interamente con la carta...un coloratissimo biglietto pop-up! E' semplice da realizzare, inoltre potete personalizzarlo ritagliando diverse forme di fiori, anche ispirandovi ai fiori preferiti dalle vostre mamme. Secondo noi per dire "ti voglio bene" non c'è niente di meglio che regalare qualcosa realizzato personalmente a mano, senza spendere una follia :) Le vostre mamme sicuramente apprezzeranno questo piccolo pensiero e il fatto che lo avete realizzato pensando a loro. E adesso cominciamo, c'è poco tempo!
Don't worry, we didn't forget that mother's day is this sunday! We are ready with a new DIY, quick and made entirely with paper...a colorful pop-up card! It's very easy to make, and you can personalize it by cutting out different shapes of flowers. In our opinion nothing says "I love you" better than gifting something handmade by you, it's not necessary to spend a madness :) Your mums will surely appreciate this little thought and the fact that you have realized it thinking of them. And now let's begin!
For the tutorial in English click on "ENGLISH" label.
[wc_tabgroup layout="box"]
[wc_tab title="ITALIANO"]
MATERIALI
- cartoncino colorato
- cartoncino bianco
- carta colorata per origami
- carta verde
- taglierino
- forbici
- righello
- colla
- pennarello
PROCEDIMENTO

PREPARA LA BASE
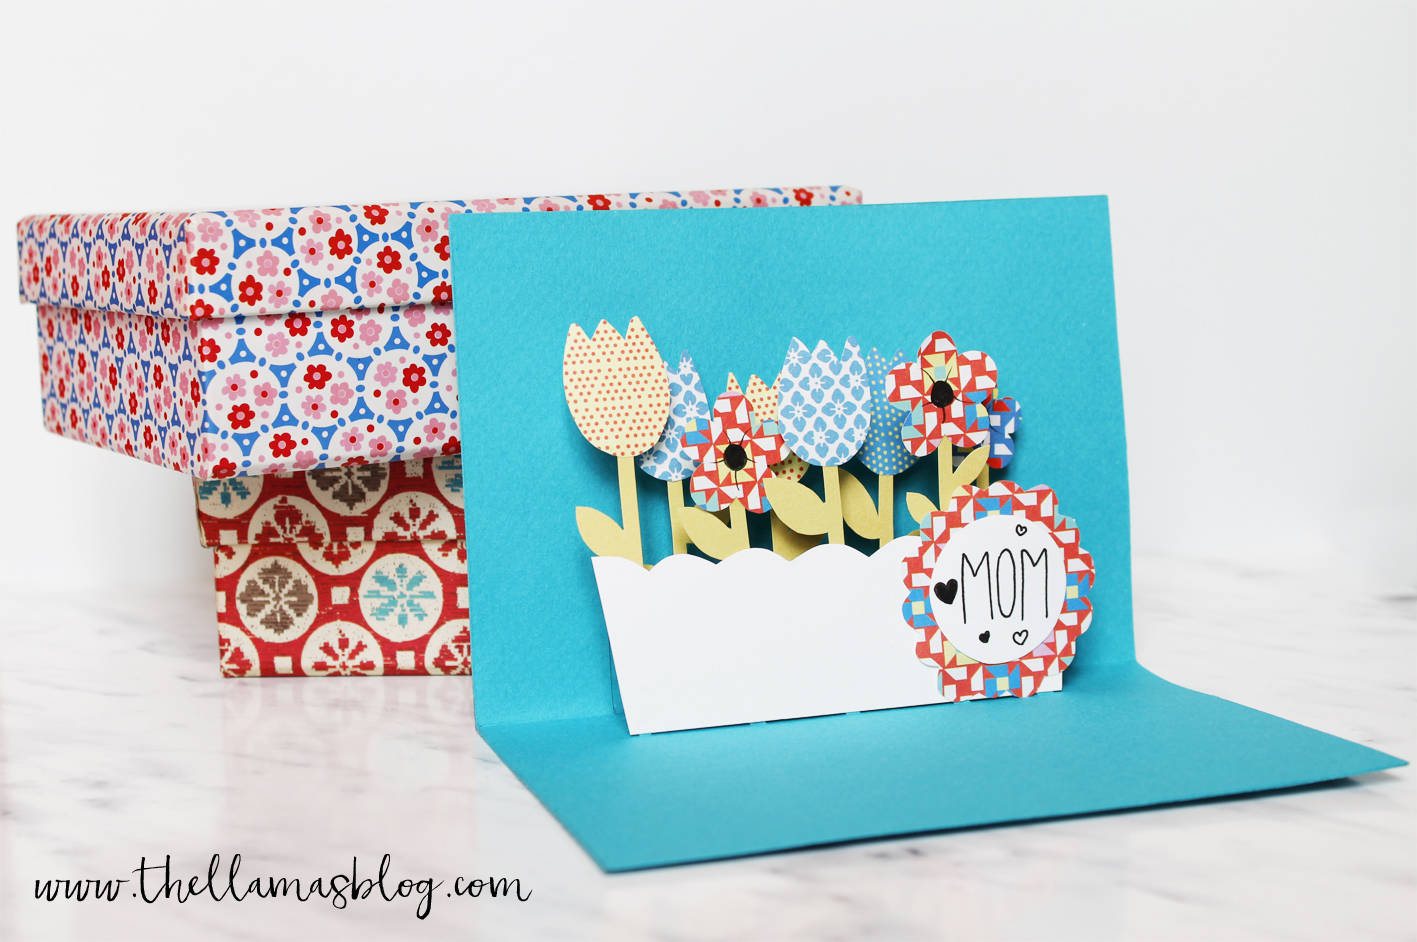
Ritaglia due cartoncini colorati delle dimensioni di 21x15cm. Piegali in due sul lato lungo per creare i biglietti. Utilizzando righello e taglierino incidi uno dei due cartoncini perpendicolarmente alla piega. Partendo da 3cm dal margine incidere delle striscioline larghe 2mm e lunghe alternativamente 4cm e 2cm, con una distanza di 1cm tra una strisciolina e l'altra [wc_highlight color="red"](1)[/wc_highlight]. Le striscioline devono trovarsi esattamente a metà della piega, per essere più precisi disegnatele con una matita prima di incidere. Alla fine vi troverete con 5 striscioline lunghe e 4 corte. Piegare le striscioline verso l'interno. [wc_highlight color="red"](2)[/wc_highlight].
RITAGLIA I PEZZI
Disegna e ritaglia: un vaso lungo circa 9,5cm sul cartoncino bianco; 8 fiori sulla carta per origami; 8 steli sulla carta verde; un cerchio di diametro 3cm sul cartoncino bianco; un cerchio ondulato di circa 4,5cm di diametro sulla carta per origami. [wc_highlight color="red"](3)[/wc_highlight]. Con il pennarello scrivi un messaggio sul cerchio bianco e se vuoi decora il centro dei fiori [wc_highlight color="red"](4)[/wc_highlight].
INCOLLA IL TUTTO
Incolla gli steli sul retro dei fiori [wc_highlight color="red"](5)[/wc_highlight], dopodichè incollali sulle striscioline ad altezze diverse, lasciando vuota l'ultima striscia a destra [wc_highlight color="red"](6)[/wc_highlight]. Incolla il vaso alla base e su di esso la cornice e il cerchio con il messaggio, posizionandolo sulla destra [wc_highlight color="red"](7)[/wc_highlight]. Infine sovrapporre i due cartoncini grandi e incollarli, in modo da nascondere i tagli [wc_highlight color="red"](8)[/wc_highlight]. Il biglietto pop-up è pronto per essere consegnato! [wc_highlight color="red"](9)[/wc_highlight]
[/wc_tab]
[wc_tab title="ENGLISH"]
MATERIALS
- colored cardboard
- white cardboard
- origami paper
- green paper
- cutter
- scissors
- ruler
- glue
- marking pen
TUTORIAL
PREPARE THE BASE
Cut two colored cardboards of the size of 21x15cm. Fold in two on the long side to create the cards. Using a ruler and a cutter, incise one of the two cards perpendicularly to the fold. Starting at 3cm from the margin, incise 2mm wide strips, alternately 4cm and 2cm long, with a distance of 1cm between one strip and the other [wc_highlight color="red"](1)[/wc_highlight]. Strips must be exactly half of the fold, to be more precise draw them with a pencil before carving the cardboard. In the end will result 5 long strips and 4 short ones. Fold the strips inwards [wc_highlight color="red"](2)[/wc_highlight].
CUT THE PIECES
Draw and cut: a pot about 9,5cm long on the white cardboard; 8 flowers on the origami paper; 8 stems on green paper; a circle (3cm diameter) on the white card; a wavy circle (about 4,5cm diameter) on origami paper [wc_highlight color="red"](3)[/wc_highlight]. With the marking pen write a message on the white circle and decorate the center of the flowers [wc_highlight color="red"](4)[/wc_highlight].
GLUE THE PIECES
Glue the stems on the back of the flowers [wc_highlight color="red"](5)[/wc_highlight], then glue them on the strings at different heights, leaving the last strip to the right empty [wc_highlight color="red"](6)[/wc_highlight]. Stick the pot on the base of the flowers, than glue over it the frame and the circle with the message, placing it on the right [wc_highlight color="red"](7)[/wc_highlight]. Finally, overlap the two large cards and glue them together in order to hide the cuts [wc_highlight color="red"](8)[/wc_highlight]. The pop-up card is ready to be delivered! [wc_highlight color="red"](9)[/wc_highlight]
[/wc_tab]
[/wc_tabgroup]